You may have noticed that more and more application processes are now entirely online and to complete these you will need a digital passport photo that meets stringent requirements. One aspect that can let down your passport photo is where you take it, but if you follow just a few simple steps, you’ll end up with a digital photo you can use.
Choose the right background
Choosing the right background is key as passport regulations state that there can be no texture or patterns behind you and no objects showing. A plain background is essential and a light colour like white or off white works best (although you must make sure your clothes are not the same colour as the background). Most people have a wall or curtain that will be suitable.
Get the light right
Photos where half your face is in shadow or you cast a shadow behind you are likely to be rejected as passport photos, so it is essential to get the lighting right. Natural sunlight is the best source, but make sure that you position yourself so that you are not casting a shadow. This is easiest to get right if you stand facing a window, so you may have to choose the right time of day for your chosen location to get this to work.
Position yourself carefully
Once you’ve got the light right and found a good background, you’ll need to stand about 0.5 metres away from it. The person taking the photo should be about 1.5 metres from you and should make sure that the photo includes your head and shoulders.
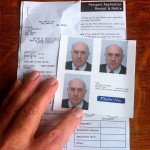
Retrieve your digital passport photo
Once you’ve set up and taken your photo, it couldn’t be easier to get an application ready digital image. Once your photo has been through Paspic’s validation system which checks to make sure it meets passport regulations, you will receive a hard copy in the post. With Paspic’s new Beta Digital Passport photo service, you will also get a link which allows you to retrieve a digital image of your photo which you can save and use in your online applications.